This guide will help you quickly understand how to manage product additional details and display them in a tabular format on your Shopify storefront.
Step 1: Install and Access the App
Go to the Shopify App Store
Search for “WebDesk Tech Details” or install from here.
Click “Install App” and follow the authorization steps
Once installed, open the app from your Shopify admin panel
Step 2: Select a Product
From the app dashboard, click on “Select Product”
A popup will appear with your store’s product list
Choose the product for which you want to add additional details

Step 3: Add Product Detail Fields
The selected product’s detail popup will open
Click the “+” (plus icon) to add a new field
Enter your Key and Value
Example:
Key: Material
Value: 100% Cotton
You can add multiple fields per product.

Step 4: Update or Delete Fields
To edit, click the pencil icon beside a field
To delete, click the trash icon
Changes will be saved automatically or with a Save button (depending on app UI)

Step 5: Display Data on Storefront
The saved key-value fields will automatically appear below the product description on your store in a clean table format
Example:

Step 6: Setup the Table Display in Theme
Go to Shopify Admin > Online Store > Themes
Click “Customize” on your active theme

Navigate to the Product Page template
Click “Add block” in the left sidebar
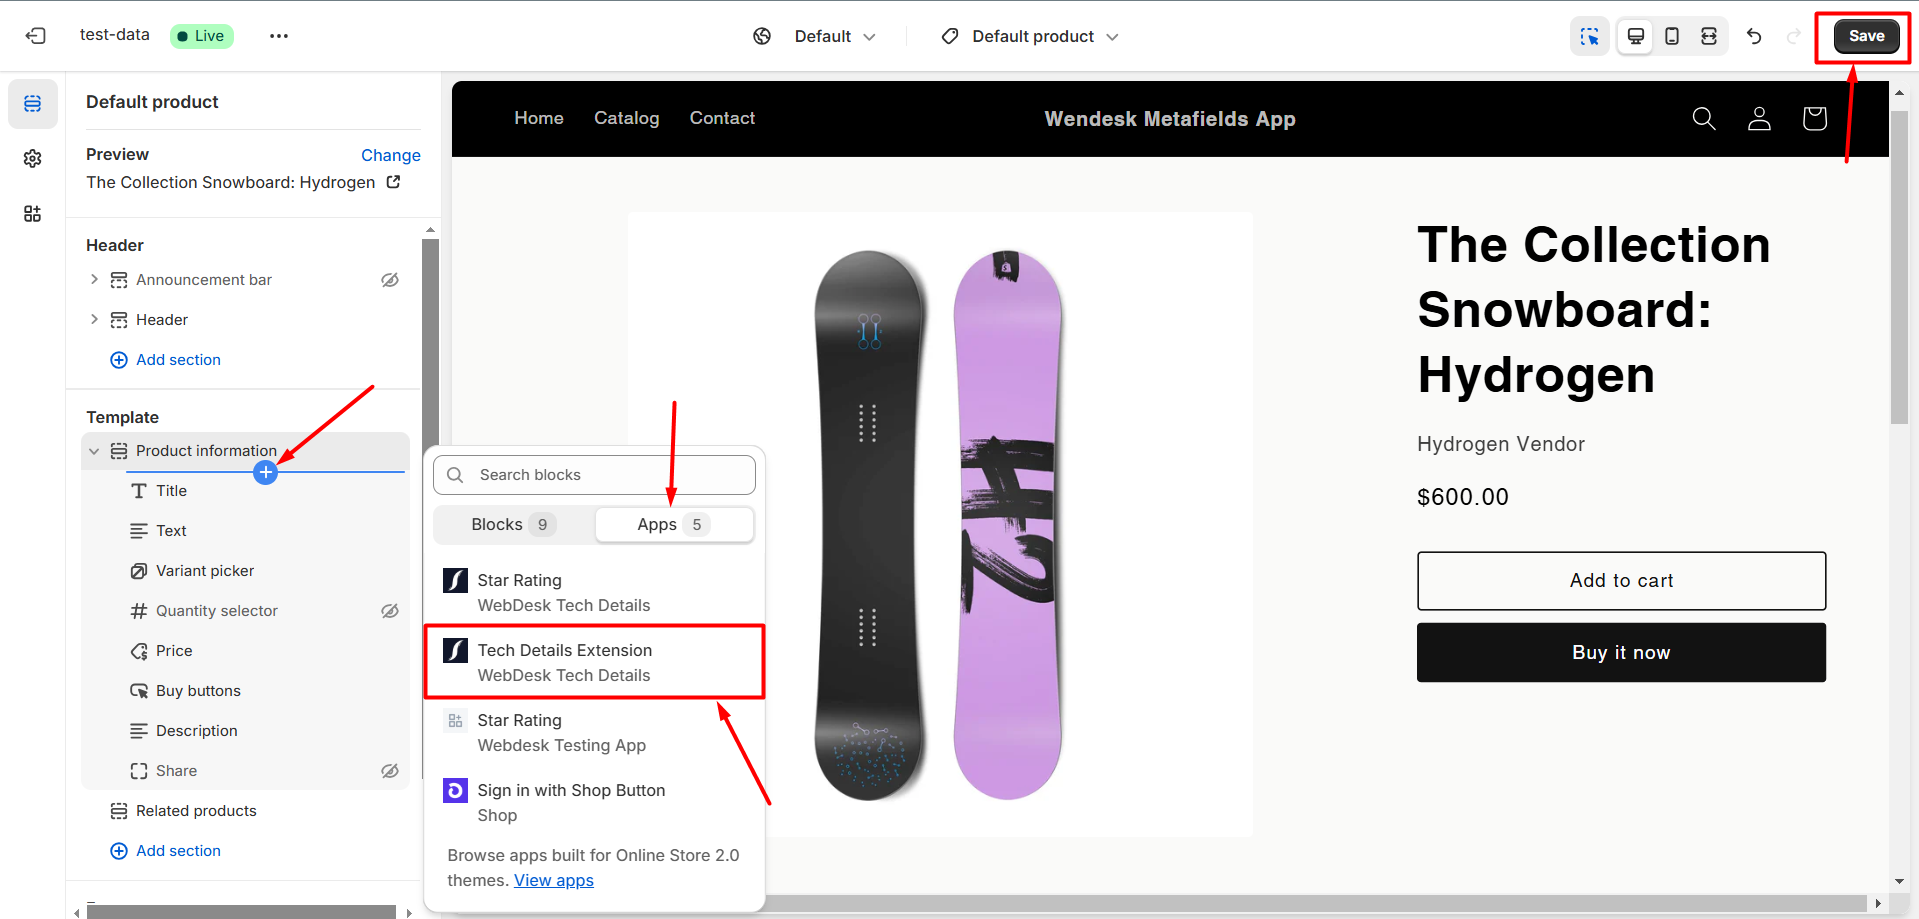
Select “Tech Details Extension”
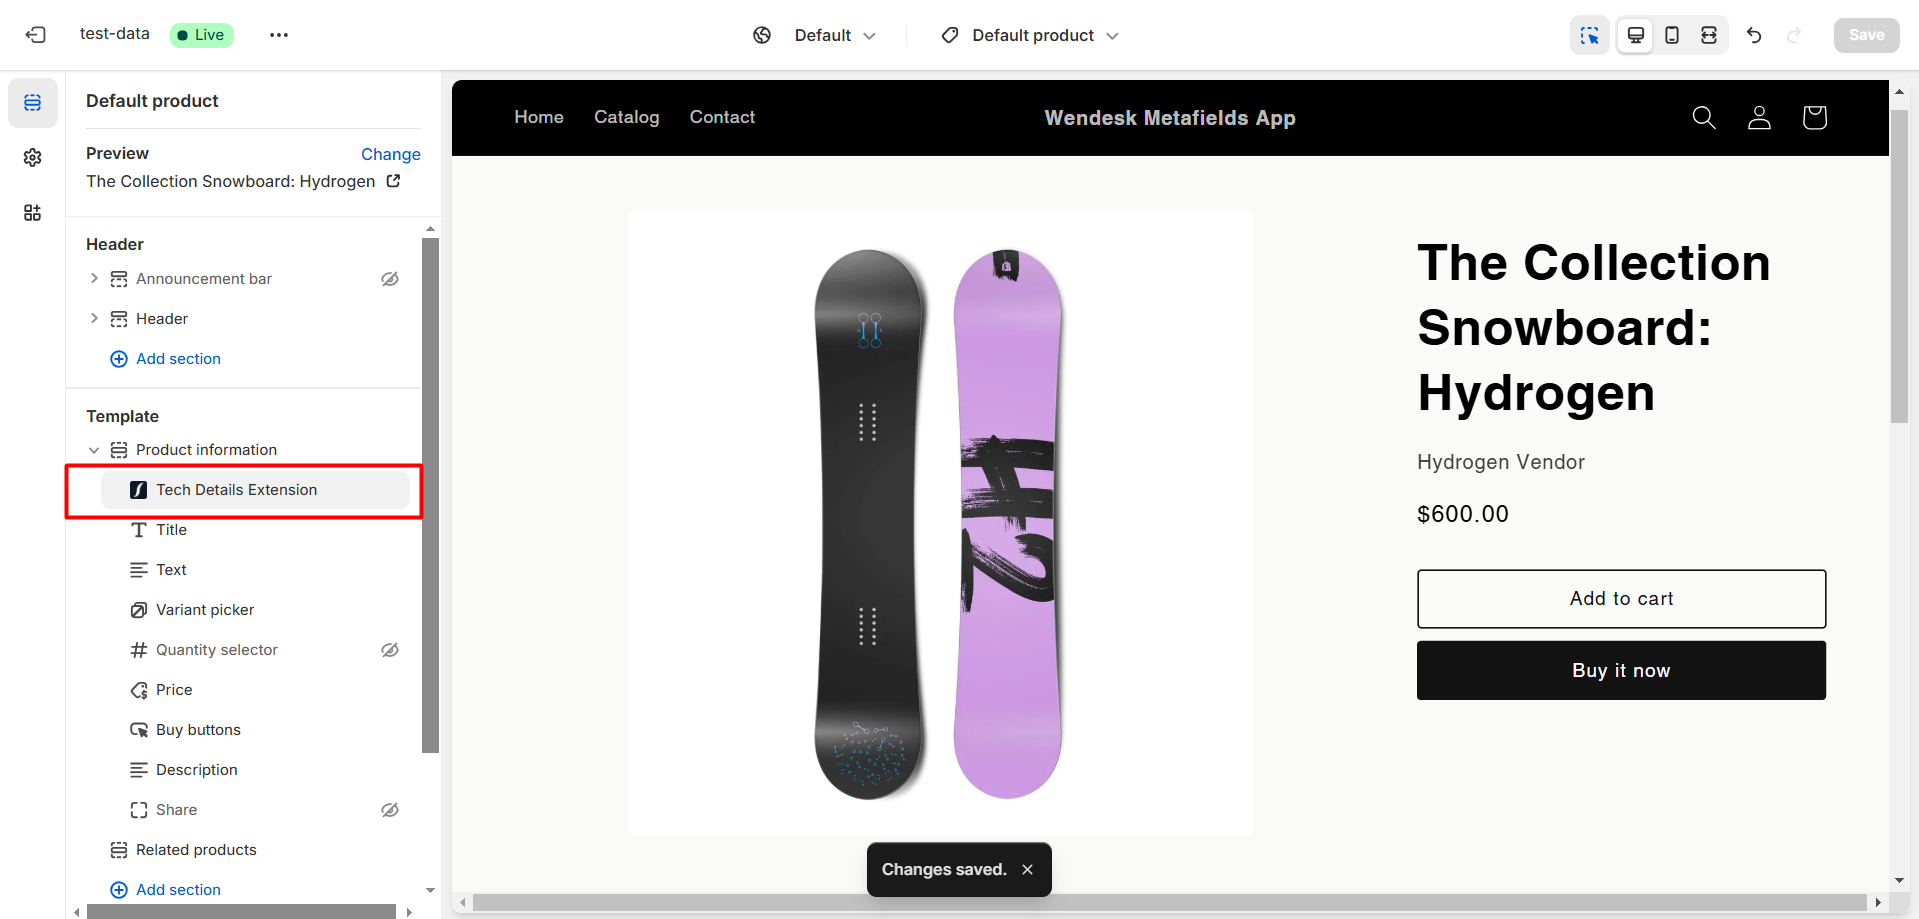
Click Save
You’re All Set
You’ve successfully added and displayed detailed product attributes. Customers can now view structured information directly on your product pages — improving transparency and enhancing their buying experience.
Was this article helpful?
That’s Great!
Thank you for your feedback
Sorry! We couldn't be helpful
Thank you for your feedback
Feedback sent
We appreciate your effort and will try to fix the article